Quick Issue to Staff
This process allows a site to issue an item to a staff member, in the status of "In Use."
Issue an Item to a Staff Member
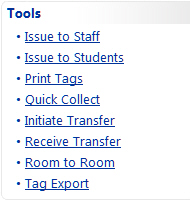
- Click on Issue to Staff, located in the Quick Links Tools menu.
-
In the Staff ID field, enter or scan the staff's ID number.
If you don't have a staff ID barcode to scan or the staff ID available, click on  Search to filter for and select the desired staff.
-
Click on the  Calendar Control icon next to the Due Date field to select a due date.
-
Click on the  Lock icon to secure the due date.
-
In the Tag field, enter or scan the tag number to be issued and click on  Save.
Save.
5.A The Staff to Staff Transfer Confirmation window will open if the Tag is issued to another staff member.
5.B. Review and Confirm
- If there are accessories which are required to be issued at the same time as this tag, they will be displayed. To issue the tag and the required accessories, click on Issue.
- The Current Inventory for this staff member is displayed in the bottom grid. It will display all of the tags issued to this staff member.
- If a Transaction Receipt is desired for this transaction, click on
 View to open the receipt as a PDF. Use the PDF reader's controls to print the receipt out.
- Click
 to exit the Issue Inventory screen.
NOTE:
If multiple tags are to be issued to the same staff member, select the  Lock icon next to the Staff ID field. This allows you to scan all of the tag numbers without entering the same staff member's ID for each tag.
Today's Transaction Receipt only displays the items which have been issued or collected today. All other items on the staff member's account, including those items issued, transferred or collected today, are available on the Full Transaction Receipt.
If the tag(s) issued to the staff member are an Asset Type of Component or Parent, an additional warning screen will display to verify the transaction. Review Components Overview for more details.
The Due Date field is an optional field. When the staff ID is entered, the cursor will skip to the Tag field. Click on the calendar control to populate the Due Date. Due dates cannot be entered manually. They must be entered using the calendar control.
When the Due Date is equal to today’s date, a small alert icon is placed next to the date. When the Due Date is past due, the text will turn red.
In the Staff to Staff Transfer Confirmation window when the Due Date is past due, text will be displayed below the grid stating the tag is past due and the due date.